Инструкция для Candy CPGC 75SQPGH
 1
1 2
2 3
3 4
4 5
5 6
6 7
7 8
8 9
9 10
10 11
11 12
12 13
13 14
14 15
15 16
16 17
17 18
18 19
19 20
20 21
21 22
22 23
23 24
24 25
25 26
26 27
27 28
28 29
29 30
30 31
31 32
32 33
33 34
34 35
35 36
36 37
37 38
38 39
39 40
40 41
41 42
42 43
43 44
44 45
45 46
46 47
47 48
48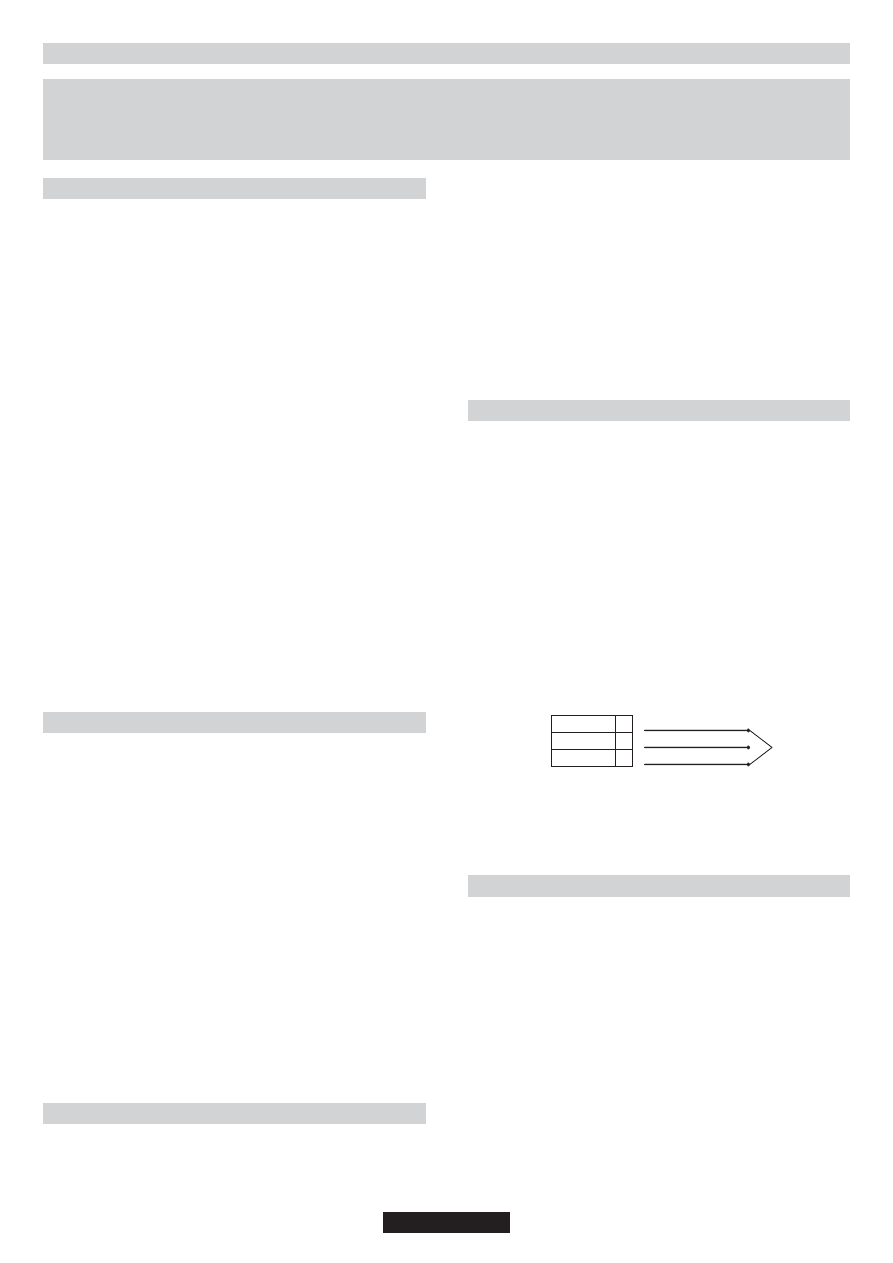
05 GB - IE
1. INSTRUCTIONS FOR THE INSTALLER
The hob may be installed in any worktop which is heat resistant to a
temperature of 100°C, and has a thickness of 25-45 mm. The dimensions
of the insert to be cut out of the worktop are in shown in
Figure 2.
If the Hob is fitted next to a cabinet on either side, the distance between the
Hob and the cabinet must be at least 15 cm
(see Figure 4)
; while the
distance between the hob and the rear wall must be at least 5,5 cm.
If it is installed on a cabinet above a cooker top , the minimum
distance requires is 70 cm
(Figure 4)
.
When there is an accessible space between the built-in hob and the cavity
below, a dividing wall made of insulating material should be inserted (wood
or a similar material)
(Figure 3).
Important - The diagram in figure 1 shows how the sealant should be
applied.
The Hob unit is fitted by attaching the Fixing Clamps supplied, using the
holes at the base of the unit.
If a hob of 60 cm is fitted above an oven which is not equipped with fan
cooling system it is recommended that openings are created within the
built in furniture to ensure correct air circulation.
The size of these openings must be at least 300 cm2 and placed as shown
in
Figure 5.
When a 75 cm hob is fitted over a built in oven, the latter must be fan
cooled.
This appliance is not intended to be operated by means of an external
timer or separate remote-control system.
CAUTION: In order to avoid a hazard due to inadvertent resetting of the
thermal cutout, this appliance must not be supplied through an external
switching device, such as a timer, or connected to a circuit that is regularly
switched on and off by the utility.
These instructions are only valid if the country symbol appears on the
appliance. If the symbol does not appear on the appliance, it is necessary
to refer to the technical instructions which will provide the necessary
instructions concerning modification of the appliance to the conditions of
use of the country.
When installing the hood above a cooker top, please consult the
installation instructions advising on the correct distance required from the
cooker top.
2. ELECTRICAL CONNECTION
(FOR U.K. ONLY)
Warning - this appliance must be earthed
This appliance is designed for domestic use only. Connection to the main
supply must be made by a competant electrician, ensuring that all current
regulations concerning such installations are observed.
The appliance must only be connected to a suitably rated spur point, a 3
pin 13 amp plug/socket is not suitable. A double pole switch must be
INSTALLING A DOMESTIC APPLIANCE CAN BE A COMPLICATED OPERATION WHICH IF NOT CARRIED OUT CORRECTLY, CAN SERIOUSLY
AFFECT CONSUMER SAFETY. IT IS FOR THIS REASON THAT THE TASK SHOULD BE UNDERTAKEN BY A PROFESSIONALLY QUALIFIED
PERSON WHO WILL CARRY IT OUT IN ACCORDANCE WITH THE TECHNICAL REGULATIONS IN FORCE. IN THE EVENT THAT THIS ADVICE IS
IGNORED AND THE INSTALLATION IS CARRIED OUT BY AN UNQUALIFIED PERSON, THE MANUFACTURER DECLINES ALL RESPONSIBILITY
FOR ANY TECHNICAL FAILURE OF THE PRODUCT WHETHER OR NOT IT RESULTS IN DAMAGE TO GOODS OR INJURY TO INDIVIDUALS.
1.1 BUILDING IN
1.2. SUITABLE LOCATION
This appliance must be installed in accordance with the regulations in force
and only used in a well ventilated space. Read the instructions before
installing or using this appliance.
A gas-powered cooking appliance produces heat and humidity in the area in
which it is installed. For this reason you should ensure good ventilation either
by keeping all natural air passages open or by installing an extractor hood
with an exhaust flue. Intensive and prolonged use of the appliance may
require extra ventilation, such as the opening of a window or an increase in
speed of the electric fan, if you have one.
•Prior to installation, ensure that the local distribution conditions (nature of
the gas and gas pressure) and the adjustment of the appliance are
compatible;
•The adjustment conditions for this appliance are stated on the label (or data
plate);
•This appliance is not connected to a combustion products evacuation
device. It shall be installed and connected in accordance with current
installation regulations. Particular attention shall be given to the relevant
requirements regarding ventilation.
If a hood can not be installed, an electric fan should be fitted to an outside
wall or window to ensure that there is adequate ventilation.
The electric fan should be able to carry out a complete change of air in the
kitchen 3-5 times every hour. The installer should follow the relevant national
standards.
2.1. ELECTRICAL CONNECTION
Check the data on the rating plate, located on the outside of the unit, to ensure
that the supply and input voltage are suitable.
Before connection, check the earthing system.
By Law, this appliance must be earthed. If this regulation is not complied with,
the Manufacturer will not be responsible for any damage caused to persons or
property. If a plug is not already attached, fit a plug appropriate to the load
indicated on the rating plate. The earth wire is coloured yellow/green. The plug
should always be accessible.
Where the Hob is connected direct to the electricity supply, a circuit breaker
must be fitted.
If the power supply cord is damaged this is to be replaced by a qualified
engineer so as to prevent any potential risk.
WARNING:
If the surface is cracked, switch off the appliance to avoid the
possibility of electric shock.
The earth wire ( green and yellow coloured ) must be at least 10 mm longer
than the live and neutral wires.
The section of the cable used must be of the correct size in relation to the
absorbed power of the hob.
Please check rating plate for the power details and ensure that the power
supply cord is of the type 3x0.75 mm² H05RR-F.
LIVE
EARTH
NEUTRAL
L
N
Power Cable
Brown Wire
Green/Yellow Wire
Blue Wire
Mains Supply
2.2. GAS CONNECTION
These instructions are for qualified personnel, installation of equipment
must be in line with the relevant national standard.
(For U.K. only: by law
the gas installation\commissioning must be carried out by a "Gas
Safe" installer)
All work must be carried out with the electricity supply disconnected.
The rating plate on the hob shows the type of gas with which it is designed to
be used. Connection to the mains gas supply or gas cylinder should be
carried out after having checked that it is regulated for the type of gas with
which it will be supplied. If it is not correctly regulated see the instructions in
the following paragraphs to change gas setting
For liquid gas (cylinder gas) use pressure regulators which comply with the
relevant national standards.
Use only pipes,washers and sealing washers which comply with the
relevant national standards.
For some models a conic link is furnished to outfit for the installation in the
countries where this type of link is obligatory; in picture 8 it is pointed out
how to recognize the different types of links (CY = cylindrical, CO = conic).
In every case the cylindrical part of the link has to be connected to the hob.
If an appliance is not fitted with a supply cord and a plug, or with other means
for disconnection from the supply mains having a contact separation in all
poles that provide full disconnection under overvoltage category III conditions,
the instructions shall state that means for disconnection must be incorporated
in the fixed wiring in accordance with the wiring rules.
provided and the circuit must have appropriate fuse protection. Further
details of the power requirement of the individual product will be found in
the users’ instruction and on the appliance rating plate. In the case of built-
in product you are advised, should you wish to use a longer cable than the
one supplied, that a suitably rated heat resistant type must be used.
The wiring must be connected to the mains supply as follows:
CONNECT
TO SPUR TERMINAL
Green & Yellow Wire
Earth Connection
Blue Wire
Neutral Connection
Brown Wire
Live Connection
Note:
We do not advocate the use of earth leakage devices with electric
cooking appliances installed to spur points because of the «nuisance
tripping» which may occur. You are again reminded that the appliance
must be correctly earthed, the manufacturer declines any responsibility for
any event occurring as a result of incorrect electrical installation.
Оглавление инструкции
- Страница 1 из 49
HOBS USER INSTRUCTIONS TABLES DE CUISSON NOTICE D’EMPLOI VARNÉ DESKY NÁVOD POUŽITĺ UND BEDIENUNGSANLEITUNG INSTALLATIONS ENCIMERAS INSTRUCCIONES DE USO INSTRUKCJE UŻYCIA I MONTAŻU ANKASTRE OCAK KULLANIM KLAVUZU ВАРОЧНЫЕ ПОВЕРХНОСТИ ИНСТРУКЦИЯ ПОЛЬЗОВАТЕЛЯ NAVODILA ZA UPORABO VGRADNJO IN
- Страница 2 из 49
CONTENT GB - IE 1. Instructions For The Installer .................................................05 1.1. Bulding In ................................................................................05 1.2. Suitable Location ....................................................................05 2.
- Страница 3 из 49
ÍNDICE PT 1. Instruções Para O Instalador ..................................................35 1.1 Preparação ...............................................................................35 1.2 Localização Adequada .............................................................35 2.1. Ligação
- Страница 4 из 49
75 cm Figure 1 Figure 2 Figure 4 Sp.da 25 a 45 mm Min 10 mm 60 cm accessible space Figure 3 Figure 5 60 cm2 120 cm 240 cm2 2 180 cm2 Min.15 cm A B C 1/2 GAS CONICAL Figure 6 INJECTOR CYLINDRICAL CONICAL Figure 8 Figure 7 04 GB - IE
- Страница 5 из 49
1. INSTRUCTIONS FOR THE INSTALLER INSTALLING A DOMESTIC APPLIANCE CAN BE A COMPLICATED OPERATION WHICH IF NOT CARRIED OUT CORRECTLY, CAN SERIOUSLY AFFECT CONSUMER SAFETY. IT IS FOR THIS REASON THAT THE TASK SHOULD BE UNDERTAKEN BY A PROFESSIONALLY QUALIFIED PERSON WHO WILL CARRY IT OUT IN
- Страница 6 из 49
When connecting the hob to the gas supply via use offlexible hoses please ensure that the maximum distance covered by the hose does not exceed 2 metres. The flexible tube shall be fitted in such a way that it cannot come into contact with a moveable part of the housing unit (e.g. a drawer) and does
- Страница 7 из 49
4. MAINTENANCE AND CLEANING 6. PROTECTION OF THE ENVIRONMENT Before cleaning the hob, ensure the appliance has cooled down. Remove the plug from the socket or (if connected directly) switch off the electricity supply. This appliance is marked according to the European directive 2002/96/EC on Waste
- Страница 8 из 49
1. INSTALLATION La mise en place fonctionnelle des appareils ménagers dans leur environnement est une opération délicate qui, si elle n'est pas correctement effectuée, peut avoir de graves conséquences sur la sécurité des consommateurs. Dans ces conditions, il est impératif de confier cette tâche à
- Страница 9 из 49
2) Serrer les joints avec des clés à molette, pensez à placer les tuyaux en position. 3) Fixer le raccord C au réseau d'approvisionne-ment en gaz à l'aide tuyau rigide ou en acier flexi-ble. 3.1. USING THE GAS BURNER Pour allumer les brûleurs, placez une flamme (allume-feu, allumette, briquet etc…)
- Страница 10 из 49
4. MAINTENANCE ET ENTRETIEN 6. PROTECTION DE L'ENVIRONNEMENT Avant de nettoyer la table de cuisson, assurez-vous que cet appareil est refroidi. Retirez la fiche de la prise ou (s'il est connecté directement), éteindre l'alimentation d'électricité. Cet appareil est commercialisé en accord avec la
- Страница 11 из 49
1. POKYNY PRO INSTALATÉRA INSTALACE DOMÁCÍCH SPOTŘEBIČŮ MŮŽE BÝT SLOŽITÁ OPERACE, KTERÁ, POKUD NENÍ PROVEDENA SPRÁVNĚ, MŮŽE VÁŽNĚ OHROZIT BEZPEČNOST UŽIVATELE. Z TOHOTO DŮVODU POŽÁDEJTE O INSTALACI KVALIFIKOVANÉHO SERVISNÍHO TECHNIKA, KTERÝ INSTALACI PROVEDE PODLE PLATNÝCH PŘEDPISŮ. V PŘÍPADĚ
- Страница 12 из 49
Některé modely jsou vybavené kónickou přípojkou pro instalace v zemích, kde je tento typ povinný; v obrázku 8 je popsané jak rozeznat různé typy spojů (CY = cylindrický, CO = kónický). V každém případě, cylindrická část připojení musí být připojená k varné desce. schopnostmi, nebo bez dostatečných
- Страница 13 из 49
4. ÚDRŽBA A ČIŠTĚNÍ 6. OCHRANA ŽIVOTNÍHO PROSTŘEDÍ Před čištěním varné desky se ujistěte, zda dostatečně vychladla. Odpojte zástrčku od elektrické zásuvky nebo vypněte jistič. Čištění a údržbu nesmí provádět děti bez dohledu. K čištění nepoužívejte drsné, korosivní prostředky, bělidla, nebo
- Страница 14 из 49
1. INSTALLATIONSANWEISUNG Die Installation eines Haushaltsgeräts kann unter Umständen eine komplexe Arbeit sein; wenn diese nicht korrekt ausgeführt wird, könnte es zu schweren Beeinträchtigungen der Sicherheit des Benutzers kommen. Das ist der Grund, warum sie von einem qualifizierten Fachmann
- Страница 15 из 49
Um den Installationsvorgang zu erleichtern und um Undichtigkeiten am Gasrohr zu vermeiden, empfiehlt es sich, den Anschluss des Gasversorgungsrohres in der untenstehenden Reihenfolge vorzunehmen (s. Abb. 6) sicheren Behandlung des Gerätes erhalten haben und auch um die Gefahren bei unsachgemäßer
- Страница 16 из 49
• überprüfen Sie, dass das Gerät stromversorgt ist • überprüfen Sie, dass die Gaszufuhr in Ordnung ist. Sollte die Ursache für die Funktionsstörung nicht ermittelt werden können, trennen Sie das Gerät vom Stromnetz und rufen Sie den Kundendienst. Unternehmen Sie nichts auf eigene Faust! 4. WARTUNG
- Страница 17 из 49
1. INSTRUCCIONES PARA EL INSTALADOR LA INSTALACIÓN DE UN ELECTRODOMÉSTICO PUEDE SER UNA OPERACIÓN QUE PUEDE AFECTAR GRAVEMENTE A LA SEGURIDAD DEL USUARIO SI NO SE REALIZA ADECUADAMENTE. POR ELLO ES UNA TAREA QUE HA DE REALIZAR UNA PERSONA AUTORIZADA Y CUALIFICADA QUE PUEDA HACER LA INSTALACIÓN DE
- Страница 18 из 49
1) Como se muestra, montaje de las piezas en la secuencia A: Adaptador cilíndrico macho ½ B: Sello ½ C: Adaptador de Gas Cónico-Cilíndrico Hembra ½ o Cilíndrico-Cilíndrico 3.1. UTILIZACIÓN DEL QUEMADOR DE GAS Para encender los quemadores colóquese una vela encendida al quemador, presionar y girar
- Страница 19 из 49
4. MANTENIMIENTO Y LIMPIEZA 6. PROTECCIÓN DEL MEDIOAMBIENTE Antes de limpiar la placa ésta tiene que estar fría. Desenchúfese o (si está conectada directamente) desconéctese de la corriente. Este electrodoméstico tiene la marca de cumplimiento de la Directiva Europea 2002/96/EC sobre Residuos de
- Страница 20 из 49
1. INSTRUKCJE DLA INSTALATORA INSTALACJA URZĄDZENIA DOMOWEGO MOŻE BYĆ SKOMPLIKOWANĄ OPERACJĄ, KTÓRA JEŻELI NIE BĘDZIE WYKONANA PRAWIDŁOWO, MOŻE POWAŻNIE ZAGROZIĆ BEZPIECZEŃSTWU UŻYTKOWNIKA. DLATEGO TEŻ, ZADANIE TO POWINNO BYĆ WYKONANE PRZEZ OSOBĘ O ODPOWIEDNICH KWALIFIKACJACH ORAZ ZGODNIE Z
- Страница 21 из 49
1) Jak pokazano na rysunku, kolejno zamontować: A: Łącznik cylindryczny męski 1/2" B: Uszczelka 1/2" C: Łącznik gazowy damski stożek-cylinder lub cylinder -cylinder 1/2" UWAGA: Podczas pracy urządzenie oraz jego elementy są gorące. Należy zachowac ostrożność i nie dotykać gorących części. Dzieci w
- Страница 22 из 49
4. CZYSZCZENIE I KONSERWACJA 6. OCHRONA ŚRODOWISKA Przed przystąpieniem do czyszczenia, należy upewnić się, że płyta wystygła. Wyjąc wtyczkę z gniazdka zasilania lub (w przypadku podłączenie bezpośredniego) wyłączyć zasilanie elektryczne. Niniejsze urządzenie zostało oznakowane zgodnie z Europejską
- Страница 23 из 49
1. KURULUM TALİMATLARI EVDE KULLANIMA YÖNELİK BİR CİHAZIN KURULUMU, DOĞRU ŞEKİLDE YAPILMAZSA MÜŞTERİNİN GÜVENLİĞİNİ CİDDİ BİÇİMDE ETKİLEYEBİLECEK KARMAŞIK BİR İŞLEM OLABİLİR. BU NEDENLE, BU İŞLEM MESLEKİ YETERLİLİĞE SAHİP BİR KİŞİ TARAFINDAN, YÜRÜRLÜKTEKİ TEKNİK MEVZUATA UYGUN OLARAK
- Страница 24 из 49
3.1. GAZLI OCAK GÖZLERİNİN KULLANIMI 1) Gösterildiği şekilde, parçaları sırayla birleştirin: A: 1/2 Erkek Adaptör Silindirik, B: 1/2Conta, C: 1/2 Dişi Gaz Adaptörü Konik-Silindirik veya Silindirik-Silindirik Ocağın gözlerini yakmak için, ateş kaynağını gözün yakınında tutun, kontrol düğmesine
- Страница 25 из 49
4. BAKIM VE TEMİZLİK 6. ÇEVRENİN KORUNMASI Ocağı temizlemeden önce, cihazın soğutulmasını sağlayın. Fişini prizden çekin veya (direkt bağlıysa) güç kaynağını kapatın. Bu cihaz, Atık Elektrikli ve Elektronik Cihazlar (WEEE) hakkındaki Avrupa Birliği Yönergesi 2002/96/EC'ye uygun biçimde
- Страница 26 из 49
Yetkili servislerimizden hizmet talebiniz olduğunda ekteki servis listesinden size en yakın yetkili servisimize ulaşabilirsiniz. Servis hizmeti ve ürünlerimiz ile ilgili genel öneri ve talepleriniz için aşağıdaki numaradan müşteri hizmetleri merkezimize ulaşabilirsiniz. 444 03 98 Müşteri
- Страница 27 из 49
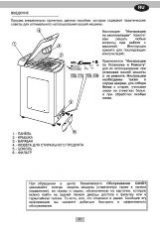
1. ИНСТРУКЦИИ ПО ВЫПОЛНЕНИЮ УСТАНОВКИ УСТАНОВКА БЫТОВОЙ ТЕХНИКИ ЯВЛЯЕТСЯ СЛОЖНОЙ РАБОТОЙ, НЕПРАВИЛЬНОЕ ВЫПОЛНЕНИЕ КОТОРОЙ МОЖЕТ ОТРИЦАТЕЛЬНО СКАЗАТЬСЯ НА БЕЗОПАСНОСТИ ПОЛЬЗОВАТЕЛЯ. ПО ЭТОЙ ПРИЧИНЕ УСТАНОВКА БЫТОВОЙ ТЕХНИКИ ДОЛЖНА ВЫПОЛНЯТЬСЯ ВЫСОКОКВАЛИФИЦИРОВАННЫМИ СПЕЦИАЛИСТАМИ, КОТОРЫЕ ВЫПОЛНЯТ
- Страница 28 из 49
Если подключение варочной поверхности к линии газоснабжения осуществляется с помощью гибкого шланга, проверьте, что длина гибкого шланга не превышает 2 м. для использования детьми, если они не находятся под наблюдением лица, отвечающего за их безопасность, или не получили от него соответствующих
- Страница 29 из 49
Серийный номер состоит из 16 цифр. Первые 8 цифр – код модели. Следующие 4 цифры – дата производства (год, неделя). Последние 4 цифры – заводские номера. 4. ОБСЛУЖИВАНИЕ И ЧИСТКА Перед тем как приступить к выполнению чистки варочной поверхности, проверьте, что она остыла. Выньте вилку из розетки,
- Страница 30 из 49
1. VGRADNJA IN PRIKLJUČITEV VGRADNJA IN PRIKLJUČITEV GOSPODINJSKEGA APARATA JE DOKAJ ZAPLETEN POSTOPEK, KI MORA BITI OPRAVLJEN BREZHIBNO, SICER OBSTAJA TVEGANJE ZA VARNOST UPORABNIKA. ZATO PRIPOROČAMO, DA DELO PREPUSTITE USTREZNO USPOSOBLJENIM STROKOVNJAKOM, KI BODO PRI TEM UPOŠTEVALI TUDI VSE
- Страница 31 из 49
1) Kot je to prikazano na skici, sestavite dele v naslednjem zaporedju: 3.1. UPORABA GORILNIKOV Gorilnik prižgete tako, da pridržite npr. vžigalico ob gorilniku, pritisnete na gumb za izbrani gorilnik in ga obrnete na levo. Če gorilnika nekaj dni niste uporabljali, pred prižiganjem počakajte nekaj
- Страница 32 из 49
4. VZDRŽEVANJE IN ČIŠČENJE 6. PROTECTION DE L'ENVIRONNEMENT Pred čiščenjem počakajte, da se vsi deli ohladijo. Potegnite vtikač iz vtičnice ali odvijte varovalko, da izključite kuhalno ploščo iz električnega omrežja. Izdelek je označen skladno z direktivo evropske Gospodarske zbornice 2002/96 o
- Страница 33 из 49
1. ISTRUZIONI PER L'INSTALLATORE INSTALLARE UN ELETTRODOMESTICO PUÒ ESSERE UN'OPERAZIONE COMPLICATA CHE, SE NON ESEGUITA CORRETTAMENTE, PUÒ COMPROMETTERE SERIAMENTE LA SICUREZZA DELL'UTENTE. È PER QUESTA RAGIONE CHE L'OPERAZIONE DEV'ESSERE CONDOTTA DA PERSONALE PROFESSIONALMENTE QUALIFICATO CHE
- Страница 34 из 49
Per alcuni modelli viene fornito in dotazione una raccordo conico, come attrezzatura per l'installazione, nei paesi dove è obbligatorio per legge; in Figura 8 viene mostrato come riconoscere i diversi tipi di raccordi (CY=cilindrico, CO=conico). In qualsiasi caso la parte cilindrica del raccordo
- Страница 35 из 49
4. MANUTENZIONE E PULIZIA 6. RISPETTO DELL'AMBIENTE Prima di pulire il piano cottura, assicurarsi che l'apparecchio si sia raffreddato. La pulizia e la manutenzione non dovrebbero essere fatte da bambini senza supervisione. Rimuovere la spina dalla presa corrente o (se connessa direttamente
- Страница 36 из 49
1. INSTRUÇÕES PARA O INSTALADOR A INSTALAÇÃO DE ELECTRODOMÉSTICOS PODE SER UMA OPERAÇÃO COMPLICADA QUE, SE NÃO FOR EFECTUADA CORRECTAMENTE, PODE AFECTAR SERIAMENTE A SEGURANÇA DO CONSUMIDOR. POR ESTA RAZÃO, ESTA TAREFA DEVE SER EXECUTADA POR UMA PESSOA QUALIFICADA PROFISSIONALMENTE, QUE A FARÁ DE
- Страница 37 из 49
Para evitar danos potenciais na placa, execute a instalação seguindo esta sequência (figura 6): 1) Tal como é ilustrado, monte as peças pela sequência: A: Adaptador cilíndrico macho 1/2, B:Junta 1/2, C: Adaptador cónico-cilíndrico fêmea de gás 1/2 ou cilíndricocilíndrico Este electrodoméstico não
- Страница 38 из 49
4. MANUTENÇÃO E LIMPEZA 6. PROTECÇÃO DO AMBIENTE Antes de limpar a placa, certifique-se de que ela já está fria. Desligue a ficha do cabo de alimentação da tomada de rede ou, no caso de a placa estar directamente ligada à rede, corte a alimentação de energia à placa., Crianças sem supervisão não
- Страница 39 из 49
1. UTASÍTÁSOK A TELEPÍTŐ SZÁMÁRA A HÁZTARTÁSI KÉSZÜLÉKEK TELEPÍTÉSE BONYOLULT MŰVELET LEHET, AMELYNEK HELYTELEN ELVÉGZÉSE KOMOLYAN VESZÉLYEZTETHETI A FOGYASZTÓK BIZTONSÁGÁT. EZÉRT FONTOS AZ, HOGY EZT A FELADATOT SZAKKÉPZETT SZEMÉLY VÁLLALJA, AKI A MUNKÁT A HATÁLYOS MŰSZAKI ELŐÍRÁSOKNAK MEGFELELŐEN
- Страница 40 из 49
FIGYELMEZTETÉS: A készülék és a hozzáférhető részei használat közben felmelegszenek. A fűtőelemeket nem szabad megérinteni. A 8 évnél fiatalabb gyerekeket – folyamatos felügyelet hiányában – távol kell tartani a készüléktől. FIGYELMEZTETÉS: A zsírral vagy olajjal végzett felügyelet nélküli
- Страница 41 из 49
4. KARBANTARTÁS ÉS TISZTÍTÁS 6. KÖRNYEZETVÉDELEM A tűzhelylap tisztítása előtt hagyja a készüléket lehűlni. Húzza ki a dugót a csatlakozóaljzatból, vagy közvetlen csatlakoztatás esetén kapcsolja ki az áramellátást. A készülék jelölése megfelel az elektromos és az elektronikus berendezések
- Страница 42 из 49
1. INSTRUCŢIUNI DE INSTALARE INSTALAREA UNUI APARAT ELECTROCASNIC REPREZINTĂ O OPERAŢIUNE COMPLICATĂ CARE, DACĂ NU ESTE CORECT REALIZATĂ, POATE AVEA CONSECINŢE NEPLĂCUTE ASUPRA SIGURANŢEI UTILIZATORULUI. DE ACEEA, INSTALAREA TREBUIE REALIZATĂ NUMAI DE CĂTRE O PERSOANĂ CALIFICATĂ ÎN ACEST SENS, CARE
- Страница 43 из 49
dintre situaţii, partea clindrică a conexiunii trebuie conectată la plită. Dacă realizaţi conexiunea la sursa de alimentare cu gaz prin intermediul unor tuburi rigide, lungimea maximă a tubului nu trebuie să depăşească 2 metri. AVERTIZARE: Aparatul şi părţile accesibile devin fierbinţi în timpul
- Страница 44 из 49
4. ÎNTREŢINERE ŞI CURĂŢARE 6. PROTECŢIA MEDIULUI Înainte de a curăţa plita, lăsaţi-o să se răcească. Scoateţi ştecherul din priză sau (dacă este conexiune directă) deconectaţi aparatul de la sursa de alimentare cu energie. Conform prevederilor legislaţiei privind gestionarea deşeurilor, este
- Страница 45 из 49
1 QC/UR 2 3 R R R SR QC / UR AUX QC AUX SR AUX SR R HOBS GAS TYPE II2HS3B/P II2ELs3B/P HU PL Gaz tipusa G20 Rodzaj gazu/Type de gaz/Gassoort/Gasart G20 Gaz nyomasa 25 mbar Cisnienie gazu/Pression gaz/Gasdruck 20 mbar P (Kw) P (Kw) Max (kW) Min (kW) AUX 1.20 SR Max (kW) Min (kW) AUX 1.00 0.23 Ø mm
- Страница 46 из 49
II 2H3+ CY, CZ, GB, GR, IE, IT, PT, SI, ES, CH, TR Tipo di gas/Gas type/Gassoort/Gasart/Type de gaz Tipo de gás/Tύттоς αερіоυ/Gaz type/Gaz Tipi Pressione gas/Gas pressure/Pression gaz/ Gasdruck/Presion gas/Πίεση του αερίου/ Pressão gás/Tlak plina/Ciśnienie gazu/ Gáz nyomása/Gaz Basıncı II 2H3B/P
- Страница 47 из 49
FR, BE II 2E+3+ Tipo di gas/Gas type/Gassoort/Gasart/ Type de gaz/Tipo de gás/Tύттоς αερіоυ/Gaz type Pressione gas/Gas pressure/Pression gaz/ Gasdruck/Presion gas/Πίεση του αερίου/ Pressão gás/Tlak gasa/Tlak plina/Ciśnienie gazu/ Gáz nyomása G20 20 mbar Tipo di gas/Gas type/Gassoort/Gasart/Type de
- Страница 48 из 49
09.2012 • REV:D • 42805672 GB - IE The manufacturer will not be responsible for any inaccuracy resulting from printing or transcript errors contained in this brochure. We reserve the right to carry out modifications to products as required, including the interests of con sumption, without prejudice
- Страница 49 из 49