Инструкция для Hyundai H-VC1086
 1
1 2
2 3
3 4
4 5
5 6
6 7
7 8
8 9
9 10
10 11
11 12
12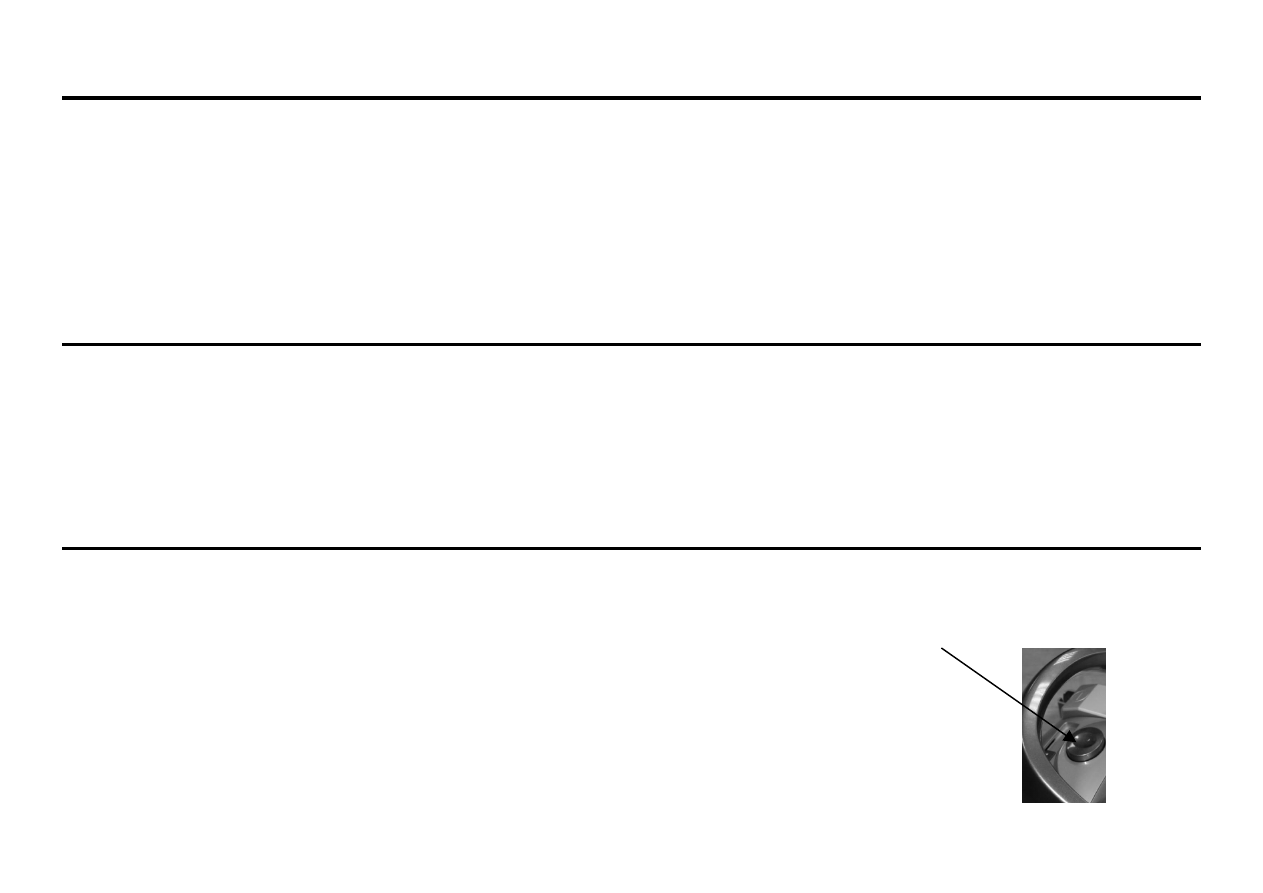
4
Instruction for use
Before using the appliance, unwind a sufficient length of cord and insert the plug into the power supply. The yellow mark on the cord shows the ideal
cord length. Do not expand the cord beyond the red mark.
Press the On/Off button to switch the unit on. To stop it press the On/Off button again.
You can adjust the vacuum cleaner power using the power control situated on the body of the unit between power switch and cord rewinding knob
- decrease power for cleaning curtains, books, furniture, etc.
- increase power for cleaning bare floor.
You can adjust the air flow using the air flow regulator on the flexible hose.
To rewind the cord, press the rewind button and guide the cord with hand to ensure that it does not whip causing damage.
Advantages of your vacuum cleaner
Your vacuum cleaner is equipped with 6 step filtration system:
- HEPA-filter.
- HEPA-filter, established at the air outlet.
The 6-step filtration system reliably keeps up dust inside a vacuum cleaner and provides maximum careful and hygienic tidying up.
Convenience of operation - the removable plastic dust bin, due to system of the clearing based on vorticose entering air in vacuum cleaner, dust instantly
settles in dust bin.
The HEPA-filter at wind outlet arrests the finest particles preventing their getting into the air
Care and cleaning
Switch off the appliance and pull out the plug from the power supply.
Clean the outside of the appliance with a soft cloth with mild detergent. Harsh or abrasive detergent will damage the outside surface.
Never immerse the appliance or cord into water and other liquids.
Cleaning dust container and HEPA-filter
Clean dust container regularly.
Switch off the appliance before cleaning dust container.
Remove the flexible hose.
For taking out the dust bin container please handle as follows :
Press the round-shaped button situated on the upper back panel of the unit (refer the figure on the right) to
release the container and pull the container out
The container has two apertures closed with 2 caps (detachable of bigger diameter (big cap) with attached hose
holder and detachable HEPA housing with HEPA and non-detachable of less diameter(small cap). Although the both caps could be opened it’s
Оглавление инструкции
- Страница 1 из 13
H-VC1086 VACUUM CLEANER Instruction manual
- Страница 2 из 13
Description 1. Wheel 2. Cord rewinding button 3. Carrying handle 4. Power control button 5. Dust container release button 6. Power switch button 7. HEPA self-cleaning button 8. Dust container big cap 9. Air inlet 10. HEPA-filter 11. Dust container handle 12. HEPA – filter housing 13. Dust container
- Страница 3 из 13
Unplug the appliance from power supply, when not in use and before servicing. To reduce the risk of electric shock, do not use outdoors or on wet surfaces. To avoid damage of the flexible hose, do not fold or pull it strongly. Do not leave the vacuum cleaner, when plugged in. Do not allow children
- Страница 4 из 13
Instruction for use Before using the appliance, unwind a sufficient length of cord and insert the plug into the power supply. The yellow mark on the cord shows the ideal cord length. Do not expand the cord beyond the red mark. Press the On/Off button to switch the unit on. To stop it press the
- Страница 5 из 13
recommended to open the cap of bigger diameter for more easy empty the container from refuse, and the HEPA housing could be pulled out from the dust container through the bigger diameter aperture only. To open the cap of less diameter press the release button situated just aside the cap (refer
- Страница 6 из 13
For cleaning the HEPA-filter, established on the air outlet, take off the rear grill from the unit (please see the figure below) and pull out the HEPA-filter. For cleaning the filter use brush and water Let the HEPA-filter dry up completely. Insert the HEPA-filter back. Important: The HEPA should
- Страница 7 из 13
1. 2. 3. 4. 5. 6. 7. 8. 9. 10. 11. 12. 13. « » - : . . . , , , . , , . . 7
- Страница 8 из 13
, . . . . , ., , , . . , . , , . . . . , . , : . . . , , ( 3,2 ). . , . . : - , . , - . . ”: “ : ; - ; « »: - , , , 8
- Страница 9 из 13
. , - . . On/Off ( ./ ). On/Off ( ./ .) . , , . - , , . . , . . , . - HEPA- HEPA- 6; , : . 6- , . . , , . , , , . . . . . HEPA- , . . . 9
- Страница 10 из 13
, , ( 2 ( . ) , : – , ), - - , – , ( , ). , ,- , , , ( ), ( . figure 1 . , , , ( . figure 4 ), figure 5), , , figure 2), . . . figure 3 HEPA, HEPA- figure 6). . , , . , , . . ( , 3 ). - , . « - » - . 10 ,
- Страница 11 из 13
« ). » – ( , , « » , , , . . – . ,- , – . - , ) , ( . . HEPAHEPAHEPA- . . : HEPA- , HEPA, . , : , . . . . . . . . 11
- Страница 12 из 13
230 , 50 2200 350-400 / 7,5 ( x ( x x ) x ) /9 447 x 334 x 345 510 x 400 x 380 12
- Страница 13 из 13