Инструкция для Hyundai Electronics H-1416, H-1416
 1
1 2
2 3
3 4
4 5
5 6
6 7
7 8
8 9
9 10
10 11
11 12
12 13
13 14
14 15
15 16
16 17
17 18
18 19
19
5
Radio operation
•
Set FUNCTION switch to RADIO position.
•
Select your desired broadcasting band by pressing CD PLAY/ PAUSE/ BAND (AM/FM) button. AM of FM will be displayed.
•
Press NEXT/TUNE-UP button or BACK/TUNE-DOWN button and then release the button when the fast scanning starts. The frequency will continue to
change and will automatically stop when a broadcast station is received.
•
To receive a weak broadcast signal press the NEXT/TUNE-UP or BACK/TUNE-DOWN button by one press at a time and adjust the frequency you wish
to receive.
Saving Stations to Memory
•
50 broadcast stations: 30 FM band and 20 AM stations can be stored to the preset memory.
•
During tuner mode, find a desired station.
•
Press
CD FOLDER/ MEM.SET/ SKIP +10 button to activate memory setting mode. The "MEM" symbol will appear on the display.
•
Press NEXT/TUNE-UP button or BACK/TUNE-DOWN button to choose the desired memory location. The location number is flashing on the left side
of the screen.
•
Press CD FOLDER/ MEM.SET/ SKIP +10 button again to store the desired station.
•
Repeat steps for storing stations to other locations.
•
To clear the memory of any location simply save a new station to the same memory.
Selecting stored stations
•
Press CD MEMORY/REPEAT/PROG BUTTON once. "MEM" symbol will appear on the display.
•
Press NEXT/TUNE-UP or BACK/TUNE-DOWN button to choose the memory location. The stored station will be selected.
Antenna
•
For FM reception, adjust the telescopic antenna appropriately to obtain the best reception on the band selected.
•
The AM signals are picked up through the built-in ferrite antenna. The set should be placed to a position for the best reception.
FM and FM stereo reception
•
In particular when stereo signal is weak and much noise are received, it is preferable to receive the programmer in mono. Press STOP/ CD/USB/SD/ FM
mode button to switch between FM stereo and mono modes.
•
If the program is received in FM stereo, "ST" indicator will light up.
Оглавление инструкции
- Страница 1 из 20
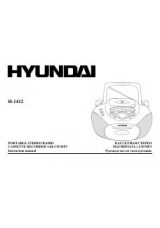
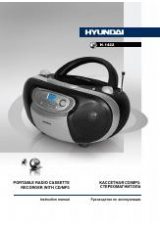
H-1416 КАССЕТНАЯ СТЕРЕО МАГНИТОЛА С CD/MP3/USB/SD/MMC Инструкция по эксплуатации PORTABLE STEREO RADIO CASSETTE RECORDER WITH CD/MP3/USB/SD/MMC Instruction manual
- Страница 2 из 20
Description Unit description 1. 2. 3. 4. 5. 6. 7. 8. 9. 10. 11. 12. 13. 14. 15. 16. 17. 18. 19. 20. 21. 22. 23. 24. 25. 26. 27. USB drive socket SD card socket Multifunction LCD display CD door IR sensor CD door finger grip Handle CD STOP/ CD/USB/SD/ PLAY button CD REPEAT/ PROGRAM/ MEMORY button CD
- Страница 3 из 20
Remote control description 1. 2. 3. 4. 5. 6. BAND / PLAY/PAUSE button BACK/NEXT / TUNE-/TUNE+ buttons PLAY MODE / MEMORY button STOP / FM MODE button SKIP+10 / FOLDER / MEM.SET button CD / USB/SD button 3
- Страница 4 из 20
Important safeguards • • • ATTENTION: The owner’s manual contains important operating and maintenance instructions. For your safety, it is necessary to refer to the manual. DANGEROUS VOLTAGE: Uninsulated dangerous voltage that may be of sufficient magnitude to constitute a risk of electrical shock
- Страница 5 из 20
Radio operation • • • Set FUNCTION switch to RADIO position. Select your desired broadcasting band by pressing CD PLAY/ PAUSE/ BAND (AM/FM) button. AM of FM will be displayed. Press NEXT/TUNE-UP button or BACK/TUNE-DOWN button and then release the button when the fast scanning starts. The frequency
- Страница 6 из 20
Cassette tape playback • • • • • • Slide the FUNCTION switch to TAPE position. Press the STOP/EJECT button to open the cassette compartment. Insert a cassette with the tape-side up into the proper Guide-rails on the inside of the cassette door. Gently push the cassette door forward (inwards) to
- Страница 7 из 20
Erase protection • • • To prevent accidental erasing of a cassette, simply break off the two plastic tabs located on the cassette tape’s rear side. When a cassette with removed plastic tabs is inserted, the recording button cannot be pressed. If a cassette is to be erased and re-recorded at a later
- Страница 8 из 20
• Press the BACK/TUNE DOWN button once to skip back to previous track. Press and hold this button to search for a particular point at high speed backward. Release the button resume normal play. Repeat mode • • • Press the CD MEMORY/REPEAT/PROG button once for single track repeat playing. Press
- Страница 9 из 20
Note: Good quality sound is guaranteed only when playing licensed MP3 discs. USB flash drive/ SD-card MP3 playback • • • This unit is equipped with a USB socket which can accept and play MP3 files stored on standard USB flash (compatible with usb version 1.1 & 2.0). This unit is also equipped with
- Страница 10 из 20
Specification CD playback format CD types Power supply Output power, RMS FM range AM range Net / Gross weight Gift box dimension (L x W x H) MP3 CD/CD-R/CD-RW 220 V, 50 Hz 3.5 W x 2 88-108 MHz 522 kHz - 1620 kHz 3 kg / 3.3 kg 315x308x197 mm Specifications and functions are subject to change without
- Страница 11 из 20
Описание Описание магнитолы 1. 2. 3. 4. 5. 6. 7. 8. 9. 10. 11. 12. 13. 14. 15. 16. 17. 18. 19. 20. 21. 22. 23. 24. 25. 26. 27. Разъем для USB накопителя Разъем для SD карты Жидкокристаллический дисплей Крышка отсека для компакт-диска ИК порт Ручка открытия крышки отсека для компакт-диска Ручка
- Страница 12 из 20
Описание пульта ДУ 1. 2. 3. 4. 5. 6. Кнопка BAND / PLAY/PAUSE Кнопка BACK/NEXT / TUNE-/TUNE+ Кнопка PLAY MODE / MEMORY Кнопка STOP / FM MODE Кнопка SKIP+10 / FOLDER / MEM.SET Кнопка CD / USB/SD 12
- Страница 13 из 20
Меры безопасности • • • ВНИМАНИЕ: В руководстве присутствуют важные указания по эксплуатации и уходу. Сохраните руководство по эксплуатации для последующего использования. ВЫСОКОЕ НАПРЯЖЕНИЕ: В приборе находятся оголенные провода высокого напряжения. Напряжение внутри прибора достаточно высокое,
- Страница 14 из 20
Использование радиоприемника • • • • Установите переключатель режимов работы в положение RADIO. В режиме работы радиоприемника нажмите кнопку PLAY/PAUSE/BAND (AM/FM) на приемнике или на BAND/PLAY/PAUSE на пульте ДУ для выбора диапазона радиоволн. На дисплее отобразиться "AM" или "FM". Для
- Страница 15 из 20
Использование магнитофона • Установите переключатель режимов работы в положение ТАРЕ. • Чтобы открыть кассетный отсек, нажмите кнопку STOP/EJECT. • Вставьте кассету в кассетный отсек пленкой вверх в специальные пазы на дверце. • Плавно нажмите на дверцу для закрытия кассетного отсека • Для начала
- Страница 16 из 20
Защита кассет • • • Во избежание случайного стирания записи удалите предохранители с кассеты. Вы не сможете нажать клавишу записи, если у кассеты удалены предохранители. Для записи на кассету, с которой были удалены предохранители, заклейте отверстия, оставшиеся на месте предохранителей, липкой
- Страница 17 из 20
Переход и поиск композиций • • Для перехода на следующую композицию нажмите один раз на кнопку NEXT/TUNE-UP. Для поиска нужного отрывка внутри трека удерживайте нажатой кнопку NEXT/TUNE-UP – трек будет проигрываться в ускоренном темпе. Отпустите кнопку NEXT/TUNE-UP для возвращения в нормальный
- Страница 18 из 20
Использование MP3 проигрывателя • • • Установите переключатель режимов работы в положение CD (MP3). Откройте отсек для компакт-диска. Вставьте MP3-диск в отсек и, нажав на дверцу, закройте ее. Диск начнет вращаться, определится количество записанных на нем треков. Воспроизведение начнется с первого
- Страница 19 из 20
Система улучшенного воспроизведения басов “Dynamic Bass Boost” • • Во время прослушивания музыки Вы можете усилить низкие частоты. Для усиления звучания низких частот установите переключатель BASS BOOST в положение “ON” (Вкл.). Чистка и уход • • • • Проверяйте батареи регулярно. Удалите батареи,
- Страница 20 из 20